Rob Smith continues his chat with me about foam latex, blood and other FX related goodies. Also, Todd and I talk about our favorite podcasts, and whether or not the word 'mustard' is actually an expression.
Todd and I will be at IMATS 2017, 13th-15th Jan 2017. How about that.
Email us at the usual address, stuartandtodd@gmail.com
Blood ! Podcast #15!
It's something gets thrown around a lot in film, TV and theatre. There's bad blood, good blood, mudbloods, blood thicker than water and blood brothers.
This episode we're talking about blood, and our guest this time is Rob Smith, blood master as well as an all-around effects bod. He also runs a lot of foam, and makes exquisite soft foam appliances which you really need to feel to appreciate.
He makes his own pieces but runs a lot of foam for other people, and you'll certainly have seen his work if you've been to the cinema in the last few years!
Blood needs to be a number of things:
- The right colour
- The right opacity
- The right viscosity
It also needs to be:
- Safe to use (skin, mouth and costume)
- Easy to clean up
As a product, there are lots of different kinds of things which can be classified as blood. For example, blood as a real biological product does things - like clot, dry, separate, form scabs and flake once dry.
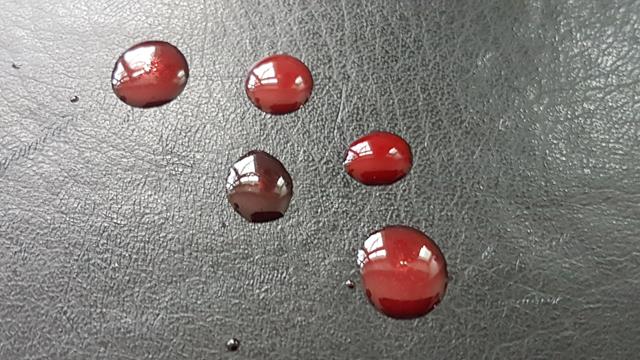
- One of these blood drops is real!
An artificial blood won't do that, so to create all these different possibilities, there are blood effects products like the standard liquid, flowable blood that comes directly out from an opening in the skin to 'clotted' blood, scab, wound fillers and pastes.
Often these are made from the same sugar or corn syrup base, thinned with water or thickened and then coloured with food grade pigments to an appropriate shade. However, as convenient and mouth safe as that may be, it attracts flies especially when shooting in warm climates. Sugarless bloods, drying bloods which are alcohol based and even specialist bloods for use in eyes and mouth are available for use where appropriate.
All this means, of course, a large amount of product range, which we touch on a bit with Rob, who makes a lot of blood, but focusses mainly on the flowable blood which gets used in rigs to pump and splash around on set.
Blood Gags
I've done a fair few blood gags (a lot of necks, weirdly), that is makeup effects which use blood that gets pumped on cue, and thinning blood so it flows right under pressure means a fair bit of effort and testing to ensure it looks right.
The thing about a blood gag is figuring out what kind of tubing to use and where to put it - we could do a whole podcast just on the ins and outs of blood gags - but there's all that stuff under the piece which needs to be right, and then the appliance over the top is just to hide that plumbing job underneath.
If blood is too thin and translucent then it doesn't look right, and if it is too thick then it won't move and spray correctly. The fact it needs to travel under pressure, through various different tubes and connectors etc. All that changes the way the blood flows, so knowing this and doing lots of tests to make sure you have a good idea about how that particular gag is going to work is important.
Interview with Rob Smith
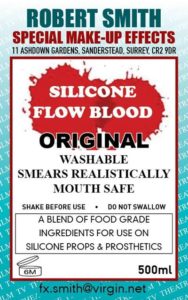
Anyhow, listen to some bloody wisdom from Rob Smith, which we recorded in his home.
It's worth pointing out the guitar you're going to hear is Rob, plucking away just for fun as he showed me his guitar collection hanging from the walls in the lounge.
Pretty cool stuff.
We chatted for a long while so I've split this up into two hour-long chats, and we shall release part 2 within the week.
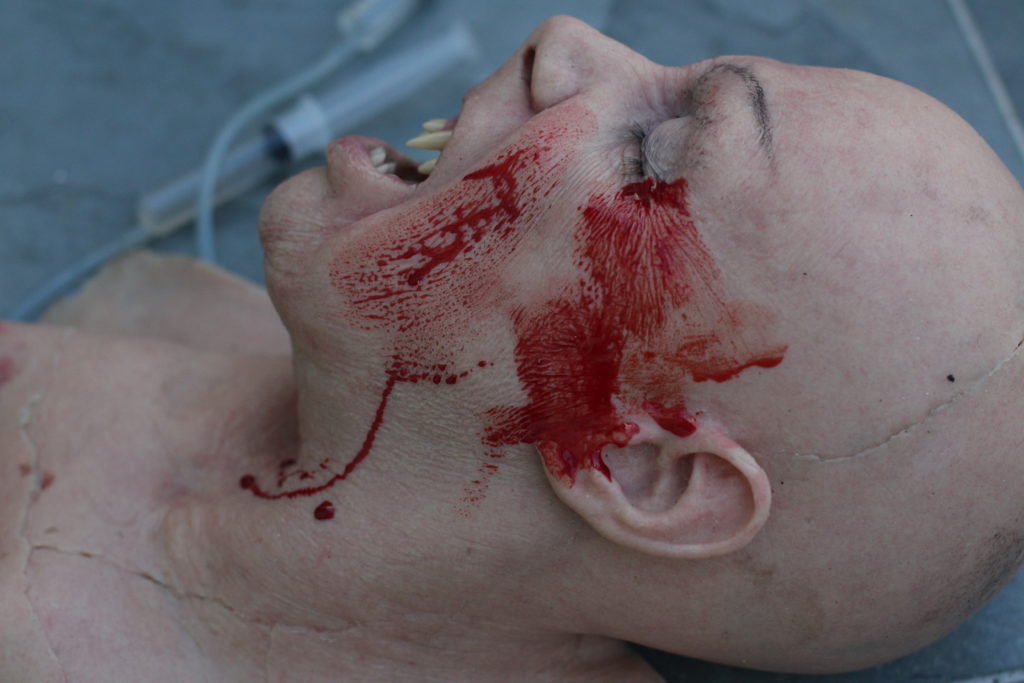
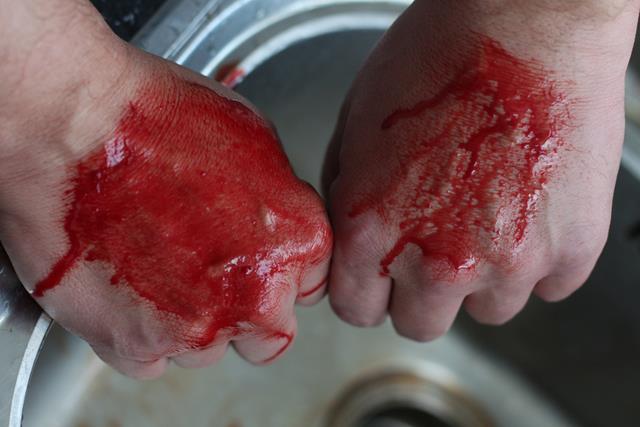
- Rob makes a great blood for use on silicone appliances which flows and smears realistically and which doesn't 'bead' up on oily surfaces which can happen with many water and syrup based blood. You can see which is which in this comparison!
Teaching & Learning Makeup FX
Being in Belfast this week teaching at Titanic Creative Management made me reflect on the various kinds of learning environments I see so I talk a bit about some of the issues I see in colleges, namely that the institutes often fail the tutors. They squeeze the goodwill and best efforts of many tutors and some don't even appreciate the requirements of a course leaving tutors woefully unsupported. I think many of the tutors do a good job despite their faculty rather than because of it.
I have said before that makeup is often underestimated, people may attend a makeup course because they themselves wear makeup so...how hard can it be, right?
The majority of people I've met at colleges really do care about being there, and some are outstanding. However, I've been to other places which fell like it was a crèche for big 20-year-old kids and you know that shit wouldn't truck if they were an apprentice.
I care about the craft side of things and I don't want to see people wasting their time. When college attendance is ruled by 'do you have the money' rather than 'look, this is hard work...do you really want to do this?'
College makeup school tutors, I salute you.
There are people who just won't turn up on time and who skip entire weeks, suddenly to return at the last minute as assessments rear their head. Then that poor tutor has to give up endless extra hours to mend that as best they can because the college took on someone that frankly doesn't want to be there. If that was a freelance apprenticeship, I can just fire you for being shit.
If you've paid to be there, it shifts the power so the relationship between the learner and the teacher is transactional rather than one of mutual reliance. Read that original blog post here: http://www.learnmakeupeffects.com/what-is-the-best-way-to-learn-makeup-effects/
There is of course nothing wrong to pay to learn, I myself pay to learn things and am glad I can do so. However, the people taking the money at colleges and universities are not directly responsible for dealing with the learners on a day to day basis. Private makeup schools, however, usually have a closer relationship with their attendees, and as such, I have seen a marked difference in attitude - they are there for a short time and really want to be there. I suppose also college is the first logical step after school, so many are attending fresh from a school education and are younger. I know I did!
This is what goes through my head when I get asked three times a week which college is best etc. or whether they should go private. It seems a college will provide an academic qualification, and that is the appeal to do that over a private course.
However, If a large portion of the course is endless theory which is not required on a set, you can become 'qualified' whilst being utterly useless. If you pump out thousands of students like that, that serves nobody except the facility which charged you a small fortune for the privilege.
Will Digital Kill The Practical?
Lots of people ask this question, and the changes are new relatively speaking so a thorough understanding of the future effect of it is not something any one person has a full explanation for. The truth is it isn't going away, it isn't taking over everything and it isn't something that you can't take part in.
Lots of people are getting in touch and asking for survey responses, so it's clearly a hot topic. It even made it to the editorial of the latest Prosthetics Magazine (well worth it by the way, I'd recommend it. Get yours here in print and digital: https://www.prostheticsmagazine.co.uk/ )
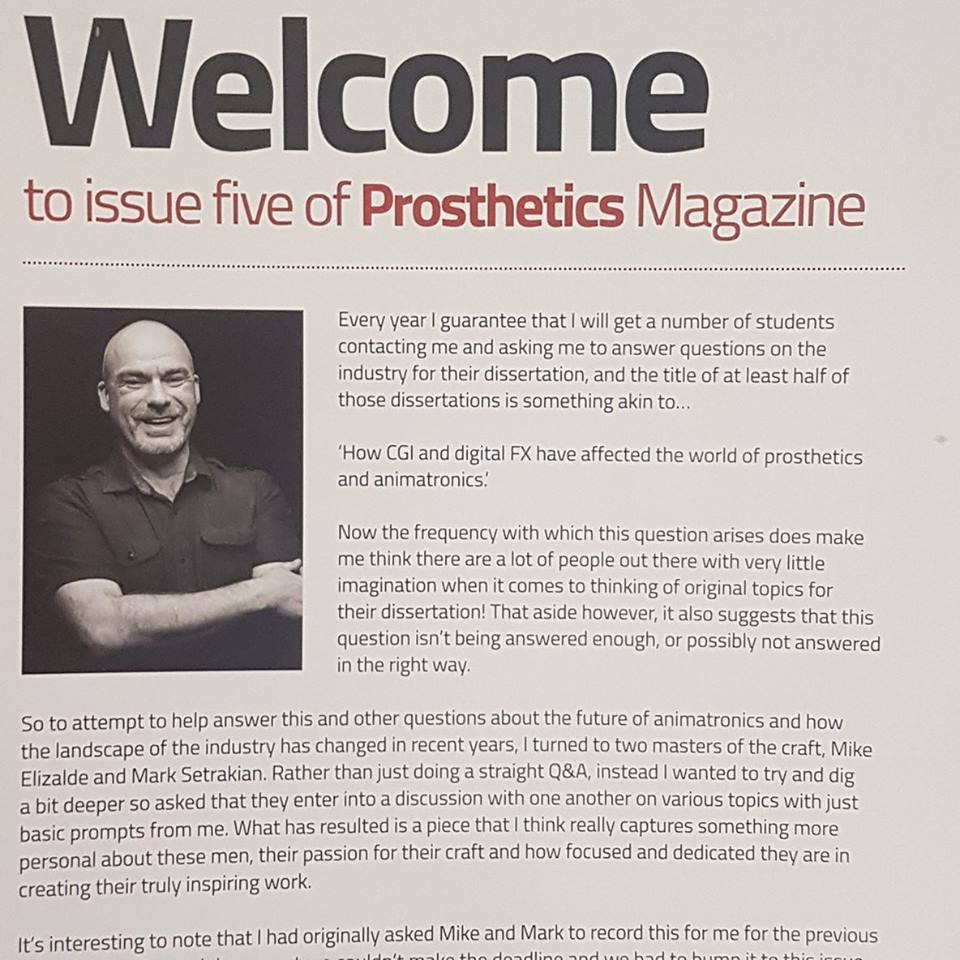
Transferable skills needed in both digital and practical work remain good basic abilities: good design, ability to render and understand anatomy, and using reference to constantly upgrade what you know. The computer doesn't do it all for you - there is a skilled person behind the keyboard. You could be one of them.
There are a lot of areas which come under the digital umbrella, and the trick is to find a way in if you are interested. If you like sculpting then check out the digital sculpting programs and photo retouching is usually done in Photoshop. This is a paid for programme but you can still get CS2, an old version for free here: https://www.adobe.com/support/downloads/detail.jsp?ftpID=3466
Also check out the free image editing software from GIMP: https://www.gimp.org/
Digital Sculpting
Digital sculpting is changing a lot of things slowly, and programmes like Zbrush and Mudbox make it possible to apply the same editing qualities of a Word document to a sculpture. Clay is great and I recommend using it - you don't need to choose just digital or just clay, I think using both is important. However, for no money at all, you can introduce yourself to the digital sculpting
To check out and download Sculptris: http://www.learnmakeupeffects.com/what-is-the-best-way-to-learn-makeup-effects/
The stripped down version of ZBrush is called Zbrush Core, so check that out here: http://store.pixologic.com/ZBrushCore/.
Keep on trucking! Remember you can get in touch through email on stuartandtodd@gmail.com, through our Facebook Page: https://www.facebook.com/stuartandtodd/ or comment on the blog post, http://www.learnmakeupeffects.com/rob_smith_pt1/
- Stuart & Todd
A little look at the influence of digital technology on the practical effects workflow.
Bear in mind the problems we try to overcome - namely to create an illusion which appears real such as a decapitation, an injury taking place or some kind of transformation - these issues are the reason that we strive for new and better methods. That desire to create is the wind in the sails, and we have always used the best available to get that.
Digital has affected everything, every industry and we have changed along with it. Despite that, it's a tool and one that many of the practical FX side view either with suspicion or glee. We wanted to chat about that and start a conversation about what it means and how we can work with it rather than against it. After all, I think that's the ultimate fear, and I think it doesn't need to be that way at all!
I talk with Steve Johnson briefly about his upcoming volume Rubberhead, Todd reveals his pixelated past and John and Tristan Schoonraad of Lifecast at Elstree studios chat about their 3D scanning work!
Email us stuartandtodd@gmail.com or drop us a comment on our Facebook page! Look us up under Battles With Bits Of Rubber!
Brick In The Yard isn't the most obvious name to give to a successful FX material supplier.
There is a good reason for it though, as you will hear in this podcast.
Mitch Rogers is the evil genius behind Brick In The Yard (BITY), one of the largest suppliers of FX materials in Texas and from the store, they ship out all kinds of materials worldwide.
Mitch took some time to show me around the shop and hang out so we could talk Gorezone magazine, silicone babies, the craft of making moulds and the perils of homemade explosives.
And why they are not a good idea.
Mitch has a great sense of humour, and the workshop is peppered with motivational posters and ironic stories, many of which stem from insane phone calls from - erm - dare we call them customers? (One demanded Mitch know that "This is create!!!" and became a T-Shirt).
That's how Mitch deals with insane phone calls. He either turns them into T-Shirts or posters, or (if you are a telemarketer with a moral compass as twisted as a barbed wire pretzel) maybe even on YouTube. After all, if they have ruthless sales angles, Mitch (or more often his alter-ego Leroy Thompson) will take that call and wring as much out of it as he can.
Anyhow, enjoy this almost two-hour chat we had at BITY!
As always, email us at stuartandtodd@gmail.com
 Rob Burman is a damned nice fella and kindly took some time to share some of his wisdom, and we are all grateful he did. Thanks, Rob!
If you don't know the name 'Burman' then you must be pretty new to the FX world, because frankly the name is as synonymous with makeup and practical effects as The Rolling Stones is to music.
(The blog post to accompany this podcast is at http://www.learnmakeupeffects.com/rob-burman/)
Rob is a third generation Burman, and the name is found in the credits of some of the most well-known horror and Sci-Fi movies ever shot. Being from the Burman legacy doesn't get you a free ride though - this guy has forgotten more than many will know and has a hefty list of credits to prove it.
I mean, he worked on The Thing for crying out loud…
…and T2…
…and Tremors…
…if this doesn't mean anything to you, then we can't be friends. Just sayin'….
Even more, he regularly teaches as a guest tutor, demonstrates at trade shows like IMATs where he regularly blows everyone away with his larger-than-life characters (check out the 'Carl' makeup based on the Pixar movie 'UP') and has some excellent lessons on the Stan Winston School for Character Arts.
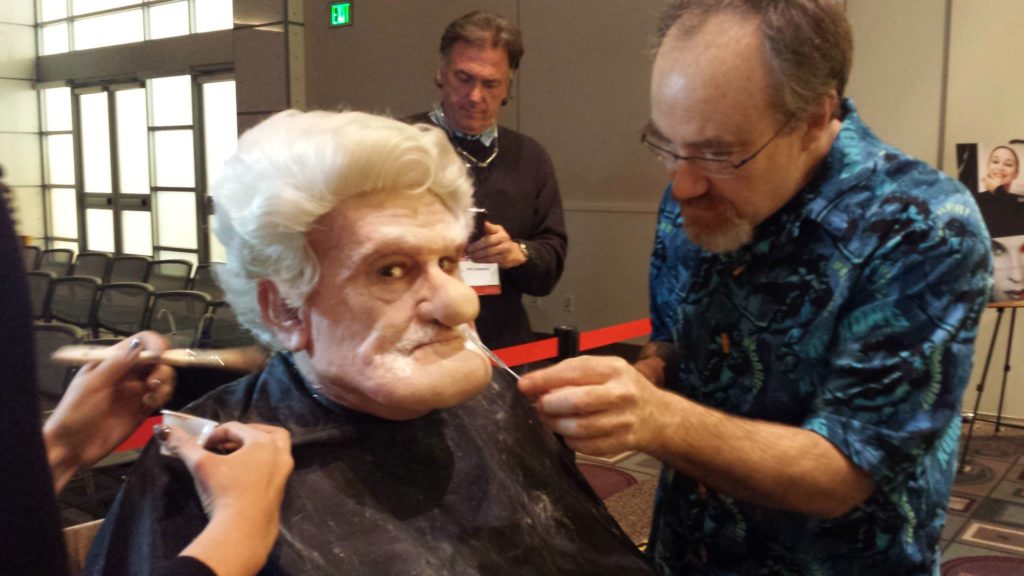
Known as a great sculptor and teacher, he also has extensive experience with foam latex, which is what we focus mostly on in our podcast. Silicone has been the poster boy material for prosthetics for a while now, and it is an excellent material for prosthetics.
However, foam is not such a squeaky wheel, and as such doesn't get the oil. It never went away, and because of the skill and equipment involved in it's manufacture, many makeup schools don't cover it nearly as much as they should.
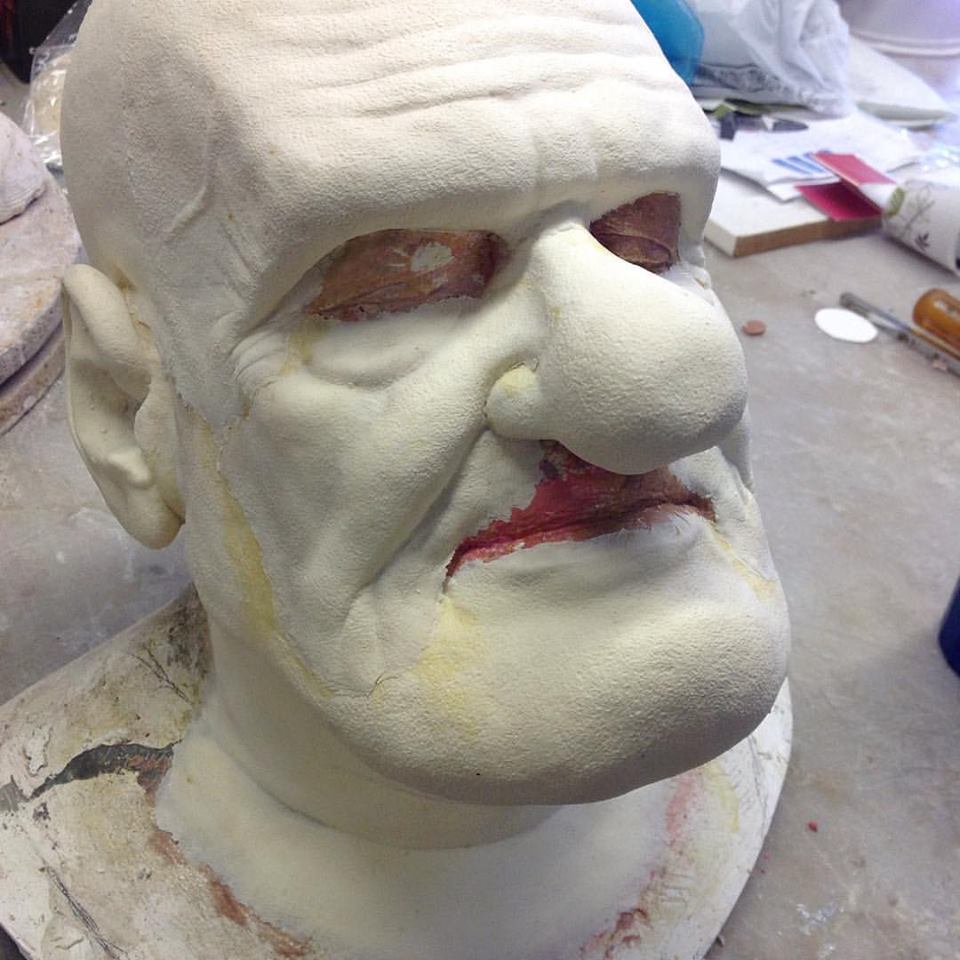
Rob has taught the manufacture and use of foam latex extensively, and his new laboratory workshops are certainly worth checking out if you are serious about FX! Check it out at Rob Burman's Laboratory!
Also, if you need pieces (but aren't in a position to make them' then check out Rubberwear, an extensive catalogue of ready-made appliances.
Rob is always busy working on something, so we were incredibly fortunate to have Todd grab him for an interview where he drops wisdom bombs like they were going out of style.
Seriously, grab a coffee, download and listen to this guy because it's worth every minute!
As always, we like it when people say nice things about us, so if you enjoy the podcast then please share it with a friend, like us on Facebook and if you can, leave a short review on iTunes. Doesn't need to be a lengthy paragraph, just a few words to show your support, let us know who is listening and it tells iTunes that we have an active community.

We are also on Souncloud, Google Play Music, Stitcher and iHeartRadio to name but a few - you can listen online or download to listen on a drive to work or walking the dog. Or whatever animal you may need to walk around the block. Also you can email us directly on stuartandtodd@gmail.com!
Thanks for stopping by!
Stuart & Todd
The last time we talked about making foam latex, the craft and materials involved in actually producing the foam. This time around, we figured it would be a good call to look at painting and art finishing.
Painting foam latex is different from painting skin or translucent appliances like silicone or gelatine, as naturally you have to create the appearance of translucency on something which is opaque.
Thomas Surprenant is long serving makeup artist with a hefty list of credits, from Deep Space 9, Donnie Darko, The Grinch, X-Men The Last Stand… but not only is he a working makeup artist, he also has developed his line of prosthetic paints and brushes which are well regarded by industry figureheads.
You know when Rick Baker calls you up to order some that you're doing something right.
As you'll hear, his exposure to painting skills and a pragmatic approach combined with creativity produce amazing results, but more importantly than that you'll come to see the depth of understanding required. It makes it attainable, and allows you to see what it is you need to be doing in order to get there yourself.
We think you'll enjoy this as much as we did, it was an education!
---------------------------------
Thomas lists a fair few artists as inspiration, and although there are inevitably sinful omissions (we'd appreciate it if you think of some to add them as comments or email us to let us know!), this is a good starting point to grow an awareness of skilled artists whose work has helped set the bar.
- Mike Smithson http://www.imdb.com/name/nm0810480/
- William Forsche http://www.imdb.com/name/nm0283825/ http://forschedesign.com/
- Thom Floutz https://www.instagram.com/imitation.of.life/
- Kevin Haney http://www.imdb.com/name/nm0359790/
- Lance Anderson https://www.stanwinstonschool.com/artists/special-effects-character-creator-lance-anderson
- Fred Blau http://www.imdb.com/name/nm0087865/
- Tim gore http://extremegorestore.bigcartel.com/
- Tim gores bloodline acrylics http://www.createxcolors.com/timgoresbloodline.html
- Gino Acevedo http://www.imdb.com/name/nm0009707/
Podcast #10 - Foam Latex: It's Smelly But Good!
Foam Latex was the main material appliances and pretty much anything skin-like was made of for long time. It is only relatively recently that silicone has taken it's place, and with good reason.
There are a lot of benefits to silicone as an appliance material, and because of these reasons it may be that if you're new to makeup effects, you may not have yet laid hands on foam pieces.
It may be that you'll never want or need to run foam latex yourself, but will apply a premade piece and we will look at that in another podcast, as this area deserves some thorough discussion. However, if you are keen to know more about foam latex then this podcast is for you. Check out some astoundingly good ready made pieces from Roland Blancaflor's RBFX studio. Anyhow, check out and download our latest podcast on this from soundcloud or iTunes:
My first ever job was as a foam runner, and I spent three months mixing and running foam latex in the 'Animated Extras' foam room in Shepperton Studios in the summer of 1994. It was a smelly and messy job, but it taught me a lot about materials, moulds and how it all fits into the pipeline.
I cut my teeth on making and applying the opaque material, and when we started using silicone instead for the majority of pieces, it was a revelation to start with a translucent material. Painting foam latex requires a different approach, as the piece needs to be the correct colour but the real challenge is to create the appearance of translucency. Thomas Surprenant knows a thing or two about painting foam latex too - he has an excellent range of PAX paints for painting latex and foam latex pieces. Check them out here. We'll delve more into this later!
To help you along with this, check out these free resources you can download:
Download Todds notes.
Download Stuarts notes.
In product news, it's well worth checking out the new cap plastic beads from Neills Materials. Check them out here.
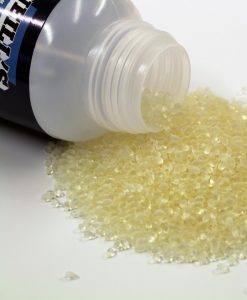
Essentially, cap plastic was always sold as a liquid and this made it a 'hazardous' item as far as air freight was concerned should the container leak. It was never an issue for us in the UK where we had things sent by road, but air freight made it a different issue.
However, by selling the raw plastic bead with no solvents, you can now more easily get the beads shipped to you are then melt them in acetone you obtain more locally to make up your own cap plastic.
Also check out the new adhesives, PRO-KEY acrylic adhesive and SIL-KEY silicone adhesive with thinners. I've used these myself and tried them out on a few makeups and can vouch for their quality!
If you enjoy this and want to help support us, please consider these three easy (and free) gestures which would help us a lot:
1. Subscribe to us on iTunes or your favorite podcast app (for example Sound Cloud).
2. Leave a review on iTunes - it doesn't need to be a lengthy paragraph....just a few words to say if you enjoy it is fine! It just lets iTunes know the audience are engaged, and tells would be subscribers what real people actually think of us. This kind soul did:

3. Tell someone else about the podcast! Sharing is caring.
The blog post on this is here: http://www.learnmakeupeffects.com/foam-latex-its-smelly-but-good/
Thanks for listening!
Stuart & Todd
#9 - Symmetry, Schools & Fools
Symmetry in sculpting appliances
Whilst teaching a class recently, a student was hung up on getting the nose perfectly symmetrical. I explained as I often do that the human face isn't symmetrical, so going for complete mirror image reflection necessary.
That said, asymmetry owing to sloppy work isn't good either - the fact that there is little perfect symmetry in nature doesn't let you off the hook!
I remember at college sculpting a full size head and a full size figure from life and using a plumb line - basically a piece of string with a lead weight on the end to keep a straight line. That helps you keep on target with the centre line, and you can use callipers to measure and plot common points to sketch out boundaries like where the eye corners start and finish, where the mouth is in relation to the nose etc.
This sounds like a video to be honest - again comment, write and let us know what you think. stuartandtodd@gmail.com
…also check out our facebook page!
Folio
Whilst at UMAE last week, I got to speaking with a lot of people starting out who wanted me to take a look at their folios. I like to talk people through what I see, and I know that when I was starting out that I really appreciated good advice from people that took the time to look through my stuff.
Shows like this are good but they can be intense, with groups of people all descending at once when they notice a folio show. There were some good pieces and I will be straight with people regarding the work, and although there are many approaches to folio layout, there are a few solid consistent aspects to a folio that I think remain regardless.
- Good clear and large images
With digital cameras, there's little excuse for blurry or badly exposed images. If images are taken on set where there is low level light, it's fair enough that on occasion the pics would be less than perfect, but if you are responsible for building something, there is plenty of opportunity to take good clear images.
Opt for professional prints - online print developers like Snapfish and Photobox for example will send you great 10x8's (A4 ish) sized photos. You may have a great printer but often this works out more expensive than buying prints, and they rarely weather well over time.
- Not too many and not too long
Viewer fatigue is not the intended result of an extensive folio, but I think it's fair to say that after a while, your brain can't take in new things with equal enthusiasm.
If you have extensively documented the manufacture process of something, you need to edit that down to a few choice images unless there is a specific reason to dwell on that aspect. It may be worth keeping your main 'general' folio streamlined with a few selected images from each project, and then keep to hand additional more in-depth folios which drill deeper into things should that be necessary.
- Easy to handle
If a folio keeps dropping leaves or sheets slide around or can't fold over easy then it becomes a bit of a chore to handle. Make sure you handle a folio and turn the pages yourself before committing to buy. If it annoys you to handle, then chances are it will annoy others too.
It's a tragedy for your good work to not be noticed as the viewer is tasked with wrangling the sleeves or relocating misaligned punched holes.
UMAE 2016
The UMAe stand for United Makeup Artists expo. It is a smaller UK trade show, but perfectly formed. I had a great time but it was exhausting. There were loads of demos going on all day, and this year I had my own stand, spoke to a lot of people, did a demo makeup and a presentation on the stage for blood rig effects.
I wanted to do a thing on blood rigs as I have done quite a few for shows over the years, and plenty on gags for Game of Thrones, and NDA's stop me from showing anyone how I actually do them, so I decided to do a demo of my own so I could show the process from start to finish without showing anything from the show.
I had a couple of cool people helping me out too - Alice Pinney and Jess Heath who applied loads of pieces I made, so thanks for the help guys. You worked hard!
Also thanks to Leanne Hicks who helped me out loads as well as patiently modelling for my makeup demo, a creepy kind of stern looking businesswoman was the idea, but it kind of ended up looking like an evil politician. I called her Angular Merkel, but we settled on The Wicked Which of the Westminster.
I'll do this as a blog post if anyone is interested - please get in touch and leave comments under this blog post or podcast
Show was nice feel to it - you can actually go up to the people and speak to them. There isn't a stadium sized crowd to navigate so it's not a huge task to speak to the people you want to talk to. Nor are there tanning booths, teeth whitening or champagne and strawberry bars.
Said hey to Richard Redlefsen, and I gave him a few sculpting tools I had made which was a nice touch - I made a bunch of tools for a makeup school called The Iver based at Pinewood for which I did a class at the week before. I knew he would be at the show so I made a few extra, and I got a kick out of giving them to him - nice guy and very talented makeup artist. He did a Phantom of the Opera makeup, and it was pretty cool.
Also Dan Gilbert was demoing for PPI, and I needed some PAX. He dashed up to his room to grab me some which he had, which I thought was rather dashing of him so thank you for that Dan. True gent!
Makeup School Observations
There are some things I noticed about work I saw from makeup schools, and I think it needs bringing up. Essentially, I saw work from someone who had travelled to LA from the UK to attend a makeup school for some months.
There were pictures of work in there which seemed both extensive in size but poor in quality. Now I know students are by definition learning, and there is going to be mixed ability but there seems to be an irresponsible approach when allowing large scale sculpting to take place when there are some fundamental areas which need addressing.
Makeup schools are a business so it's only right they charge for their service, but I have heard and seen many examples of people who travelled far and spent a lot and when you see what they have taken away from it then you wonder if it is a fair exchange.
As with any business, there are some sharp practitioners and some outstanding examples. I think it would be a good idea to run this checklist over when considering a makeup school.
- Check who the tutors are
- Look at previous students work
- Speak to previous students
- Is there a screening process or do they take anyone who can pay?
Faceoff
I've met a few of the contestants from the show, and to be honest they seem pretty cool - they need to have ability and character to get selected for sure. Hoever, the show is largely concerned with ratings (it's a TV show after all) and less concerned with processes which is what I care about.
We riff a little about the effects of the show, and how annoying it is that people whose only exposure to the industry is watching a few episodes feel qualified to comment on what we may be doing wrong. "It didn't look that hard on Faceoff..."!
Face casting disasters
We’ve all heard of the anecdotal face casts that went hideously wrong – the result of phenomenally terrible practice on the part of people doing it. Things like using bare plaster all over the face, bears and eyebrows becoming stuck or undercuts locking heads – it’s common sense mostly but that is not as common as you’d imagine.
Anyhow, check out these howlers, and if you know of any outrageous lfecasting videos which are not here, please do get in touch and send us a link so we can share it! Let’s show everyone how NOT to do it!
https://www.youtube.com/watch?v=sVUHlDou6cQ&feature=youtu.be&app=desktop
https://www.youtube.com/watch?v=09rUbu33Z1E
http://www.liveleak.com/view?i=077_1462827743
Incidentally, this video collaboration I did with Klaire de Lys shows a way to lifecast safely without taking insane risks:
https://www.youtube.com/watch?v=2NyF5bKlkT0
Stay creative!
Stuart & Todd
Blog post on this podcast is here:
It seems it would be handy to have some sensible steps to actually start making things. So check out the podcast on this very subject and also the lowdown on cap plastic.
After all, the longest of journeys start with a single step, so having some steps in mind will help you start if you are not sure where to begin making.
One thing to say is that you don’t have to go through all of the processes to begin with. Just sculpting is at least getting you involved in the act of making, without the added cost or time of making moulds, casts and applying. You can of course do those too if your means permit, but the point is that if you haven’t got all that, you can still start making things in some capacity.
Make Small Things Well
We'd recommend making small things well, and then expand sophistication and scale once you gain confidence. Wounds and casualty effects are a good way to begin, because if you do make pieces to stick on, and things go a little wrong, you can smother a bit of blood or bruising over the offending edge or error. Then, as you get better, try to step away gradually from gore and try to hide your efforts less behind the red stuff.
Noses are great things to do, and if you can do a flawless nose which looks great, the scale up to noses and eyebags. Then cheeks, chin and a neck. If the nose isn’t right, then figure that first. Nobody worth their salt is impressed with huge full body appliances painted badly or with terrible edges if it doesn't display a high level of skill. So get that skill by not spreading yourself too thin on big makeup jobs.
Looking at the work of the current masters of the trade is a great way to be inspired (and sometimes a little upset by how good the work can be) and then being able to place yourself more accurately on a continuum - where do you sit on the scale? It’s well worth checking these artists out if you haven’t yet seen any of their stuff. This is by no means a complete list - no doubt I will be blasted for the glaring omissions but it serves to start you off.
Cap plastic
Cap plastic (not ‘cat plastic’ as some have misheard) is a flexible plastic usually supplied as a concentrated thick liquid, and thinned down with solvents for use either by conventional brushing or with an airbrush. Naturally, for airbrushing it needs to be thinned considerably to avoid blocking the fine nozzle. Clean the airbrush out after with the appropriate solvent.
Traditionally, bald cap plastic was acetone based and used to pretty much just make bald caps (although latex can also be used very successfully for bald caps), and the edges could be melted with acetone.
As silicone appliances began to use bald cap plastic as an encapsulant, so it was that more cap plastic was being used on the face instead of just as bald caps. The notion of a bald cap material which could be thinned with alcohol came about as a much less aggressive solvent to use on the skin.
Check out our Facebook page and give us a like!
If you dig what we’re doing and want to hear more, please be sure to subscribe to us in either iTunes or if you are an Android user like me, try a podcast app called ‘Pocket Casts’. I’m a podcast nut and listen to a lot myself, and this app is a great way to easily manage and subscribe to feeds to get access to latest episodes as well as back catalogues.
Also, please consider leaving a review in iTunes, or sharing this on social media. It's a great way to show your support and really helps us out!
You can also find and download us from Soundcloud!
In the second and final part of the interview with Geoff Portass, we talk more Ken Russel, Pinhead and FX stories plus some insights into the right way to go about learning some of this crazy stuff.
Leave feedback and email your technical questions at stuartandtodd@gmail.com
We love to help!
Check out Stuart's Pinewood Studios workshops this year - dates on the website: http://www.learnmakeupeffects.com/workshops/
Hey folks, it’s just me today as Todd is pretty sick with a bad cold, so get well soon Todd. Hope you get fixed up and back on track soon.
We’ve got a great interview with someone who was the first person I ever got in touch with. Geoff Portass started Image Animation with business partner Bob Keen, and the company worked on some iconic genre movies and shows in the late 80’s and early 90’s. They also spawned the careers of some of the best known fx artists working today.
I still have my letters from 1990 when Geoff replied to my questions when I was 16! I sent foam samples of foam latex I had made at home and asked about the makeup they used and replied every time. Check the blog post to see these
I also remember meeting Nick Dudman at my college in 1993, when I basically cornered him for half an hour and asked him all these questions that nobody else could answer – pre Goole etc. I then went on to work for Nick on a few Harry Potter and Mummy movies.
Anyhow, I drove up to Geoff’s place and we chatted for a good few hours and I had to split this into two podcasts, as there was so much material and it seemed to fall into two logical topics – the film stuff and the teaching stuff. So, this is part 1 which looks at the film stuff and the next episode will be looking at the teaching stuff too.
Just a quick mention of some new workshops coming up at Pinewood studios in the next few months, keep an eye out for announcements and dates on the workshop page of the website:
http://www.learnmakeupeffects.com/workshops/
Also, just to remind you that we’d love to hear from you. Feedback is always welcome and as we normally look at solutions to problems (hence the podcast being called Battles with bits of Rubber).
Our email is stuartandtodd@gmail.com
Finally, if you like the podcast please consider leaving a review on iTunes. It's the best way you can help us out, after all if you enjoy it then hopefully kindred spirits will.
Colour theory is a crucial part of makeup, especially if you are in the business of trying make a portion of the face out of rubber and make it look like it belongs there and is the same as the real skin which surrounds it.
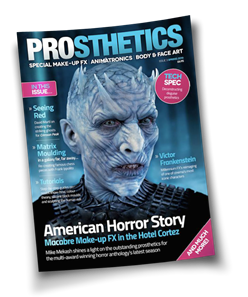
This podcast accompanies the article we wrote for Neill Gortons 'Prosthetics' magazine, jam packed with tutorials and great behind the scenes goodies for all things prosthetic!
This is especially true when mixing your skin tone into your appliance material in the case of silicone or gelatine appliances.
The materials are different, but the principles of colour theory and how to create skin tones remain the same. This colour is IN the pieces rather than ON them.
We have gone on a fair bit in the past about the importance of colour and colour theory in posts about using photoshop to match skin tones, and 7 tips for painting skin tones. The reason...? Because it really matters and it's actually rather simple.
It's important to get the base tone of your appliances right, as you don't want to make things harder for yourself later by creating an appliance which fights you all the way because of poor base tinting.
It's very frustrating to have to use the makeup to 'correct' a badly or inappropriately coloured appliance when you can get the base tone to do most of the work for you.
Check out the blog post which has video and a podcast download for this episode right here...
....and email your questions and feedback to us at stuartandtodd@gmail.com.
Todd and I have been chatting, as we both let the blogging slip because of work - so we are back with a plan to do more podcasts to give responses to email questions on a regular basis.
So, we caught up in this podcast to get the ball rolling again - listen or download it from here. It was recorded on Friday 13th....so it isn't about the movie Friday the 13th, so sorry to the Michael Myers fans.....this time we're talking plaster heads and master moulds, plastiline and apps to help design.
Check out the blogpost on it here: http://www.learnmakeupeffects.com/appsolute-idiot/
We sure do love a good question too so please ask your techy FX questions to us at our email stuartandtodd@gmail.com
Read the blog post to accompay this podcast: www.learnmakeupeffects.com/shooting-guns-at-meat
This time we take an interesting approach to capturing the tissue damage caused by gunshots and being able to safely recreate the three dimensional effects by moulding the results.
It's a novel way of testing out some theories. All we need is some sides of meat, a range of firearms, some privacy and an afternoon in the Colorado woodlands. All in the name of FX reference. Fun times!
Got an idea for a podcast episode for us? stuartandtodd@gmail.com
Check out the blogpost on this subject too: www.learnmakeupeffects.com/lifecasting-tipstricks/
Lifecasting is an essential, basic skill used in makeup effects and prosthetics - whether to create a custom fit appliance or to make a lifelike prop without sculpting from scratch.
In this podcast, Stuart & Todd share cool tips and tricks about this important yet varied subject.
Got an FX question you want to see covered? Email it to stuartandtodd@gmail.com
This podcast is the first joint blog post venture with Stuart Bray and Todd Debreceni.
Todd is author of 'Special Makeup Effects For Stage And Screen', what many consider to be the modern makeup FX bible.
Stuart Bray is a working makeup FX artist with many years experience. Credits include 'Saving Private Ryan', 'Shaun of the Dead', 'Dr Who' and more recently 'Game of Thrones'.
This one is all about the glues and removers we use with prosthetics. One thing is for sure, people get confused about which is what and why. This podcast breaks it down and you can be assured its really not as complicated as it sounds!
If you have any FX questions you would like to see made into a featured blog post, then get in touch: stuartandtodd@gmail.com

